Note :1
Before starting remember that Windows Server 2008 R2 is 64bit only so you will need to install the SQL Server 2008 x64 bit version of the database.
Step 1.
Go to http://support.microsoft.com/kb/968382 and download the latest service pack for SQL 2008. Also remember to download the 64bit version of the service pack.
Note:2
This is required as SQL 2008 was released a full 2 years before Windows Server 2008 R2. As such it was not originally written to work for the newer operating system. The support for the newer server OS was later added in Service Pack 1.
Step 2.
Run Setup.exe from the SQL Server 2008 install CD and click Run Program on the Program Compatibility Assistant
Info: Windows Server 2008 is giving you a clear warning that the version of SQL is not compatible with Server 2008 R2 and give you a link to the service pack for downloading.
Step 3.
Click on Installation on the left hand column.
Step 4.
Click on New SQL Server stand-alone or add features to an existing installation.
Step 5.
Again you are warned about compatibility issues. Click Run Program
Step 6.
Click on Show Details and make sure that all the setup support rules have passed and then click OK
Step 7.
Type your key in the field and click Next
Step 8.
Tick I accept the license terms and click Next
Step 9. Click Install Step 10. Click Next Step 11. Select the components you want to install and click Next Step 12. Configure the Instance name and details and click Next Step 13. Review the disk space requirements and click Next Step 14. Configured the Service accounts that you want to use and click Next Step 15. Add a SQL Server Administrator and Click Next Step 16. Click Next Step 17. Click on Show Details and review the install rules and then click Next Step 18. Do a final review of the install and click Install Wait… Step 19. Click Next Click 20. Click Close Now you MUST MUST MUST install Service Pack 1….
Step 20. Now run the Service Pack you just downloaded…
Step 21. Click Next
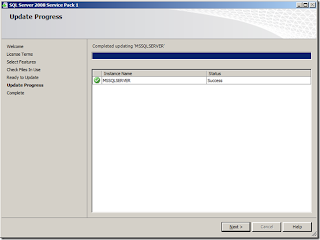
Step 22. Tick I accept the license terms and then click Next Step 23. Review the features that are going to be upgraded and click Next Step 24. Click Next Step 25. Click Update Step 26. Click Next Step 27. Click Close Your Successfully done…
Before starting remember that Windows Server 2008 R2 is 64bit only so you will need to install the SQL Server 2008 x64 bit version of the database.
Step 1.
Go to http://support.microsoft.com/kb/968382 and download the latest service pack for SQL 2008. Also remember to download the 64bit version of the service pack.
Note:2
This is required as SQL 2008 was released a full 2 years before Windows Server 2008 R2. As such it was not originally written to work for the newer operating system. The support for the newer server OS was later added in Service Pack 1.
Step 2.
Run Setup.exe from the SQL Server 2008 install CD and click Run Program on the Program Compatibility Assistant
Info: Windows Server 2008 is giving you a clear warning that the version of SQL is not compatible with Server 2008 R2 and give you a link to the service pack for downloading.
Step 3.
Click on Installation on the left hand column.
Step 4.
Click on New SQL Server stand-alone or add features to an existing installation.
Again you are warned about compatibility issues. Click Run Program
Step 6.
Click on Show Details and make sure that all the setup support rules have passed and then click OK
Step 7.
Type your key in the field and click Next
Step 8.
Tick I accept the license terms and click Next
Step 9. Click Install Step 10. Click Next Step 11. Select the components you want to install and click Next Step 12. Configure the Instance name and details and click Next Step 13. Review the disk space requirements and click Next Step 14. Configured the Service accounts that you want to use and click Next Step 15. Add a SQL Server Administrator and Click Next Step 16. Click Next Step 17. Click on Show Details and review the install rules and then click Next Step 18. Do a final review of the install and click Install Wait… Step 19. Click Next Click 20. Click Close Now you MUST MUST MUST install Service Pack 1….
Step 20. Now run the Service Pack you just downloaded…
Step 21. Click Next
Step 22. Tick I accept the license terms and then click Next Step 23. Review the features that are going to be upgraded and click Next Step 24. Click Next Step 25. Click Update Step 26. Click Next Step 27. Click Close Your Successfully done…


No comments:
Post a Comment